Handloading the Cutting Edge Bullets Handgun Raptors
The Cutting Edge Bullets Handgun Raptors have proven themselves to me over the past few seasons as a top performing bullet in both accuracy and terminal performance. When I began loading the Handgun Raptors I found some differences in loading them vs jacketed bullets and developed a few techniques along the way to make loading and achieving top performance easier. 
(Left to Right. Hornady XTP 110 357, CEB HR 105 357, Hornady XTP 158 357)
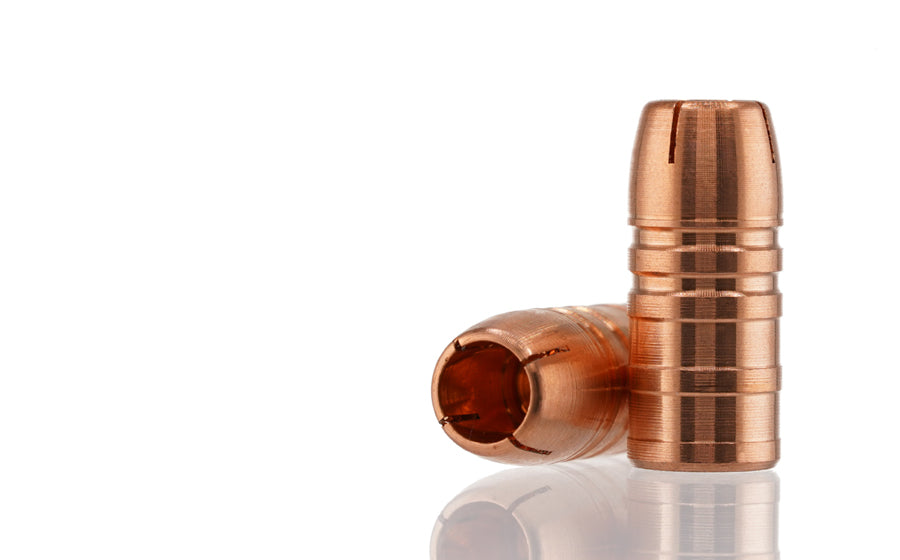
Let’s start off by diving into the differences between the Handgun Raptor and a jacketed bullet. Being made of 100% copper, the bullet is lighter weight than a jacketed bullet of the same length which has a lead core. The Handgun Raptor also has rings/groves spaced around the bullet similar to lube groves on a cast bullet whereas a jacketed bullet often has smooth sides and one crimp grove or cannelure. These groves on the Handgun Raptor seal the bullet to the bore preventing gas from passing around the bullet and by design reduces bore drag and pressure.

(Left CEB Handgun Raptor 105 357, Right Hornady 158 XTP 158 357)
As we go forward we are going to focus on reloading the 357 magnum. I have found this same information for the 357 magnum to be true for 44 magnum, 460 S&W magnum, and other revolver cartridges.
As you look at the previous pictures you will see how the cannelure of the 158 XTP lines up with the top groove of the 105 Handgun Raptor and the 110 XTP is much shorter overall than the Handgun Raptor. Here is where we start to get a little different in figuring out what components to use for loading these. All of the mono metal bullet makers recommend using reloading data for a similar weight jacketed bullet. The closest jacketed bullet weight to the 105 Handgun Raptor is the 110 in a 357 magnum. When you look up reloading data for a 110 jacketed bullet you will find some fairly high volume powder charges that would not be possible to fit within the case behind the length of the 105 Handgun Raptor. Also you will notice that the loading manuals recommendations for their top performing powder are often centered around very slow burning pistol powders such as Hodgens H110, Little Gun, or powders of similar burn rate. These slow burning magnum handgun powders simply will not work with the Handgun Raptors. Cutting Edge Bullets Sealtite Bands reduce bore drag so much that it does not give magnum pistol powders enough time to build up pressure thus you will end up with an anemic 1000 feet per second puff gun load.
When I began loading the Handgun Raptors the lack of velocity with magnum powders was the most challenging part of the load work up for me. What I did to overcome this was I looked at a burn rate chart that has been in my reloading room forever and compared it to the reloading manuals. I then selected the fastest powder appropriate for the given cartridge. I knew that I needed to speed up the ignition of the powder so I also began using magnum primers with all of the cartridges except the 460 S&W, which I used large rifle primers.
I ended up settling on two powders for all of my Handgun Raptor reloading thus far; Ramshot Enforcer and Accurate Arms #9. Both of these powders were faster than the “standard” magnum handgun powders and also of a smaller granule size.

I have found it to be extremely important to use new brass with the Handgun Raptors. For this I always use the main name in handgun brass in the USA, Starline Brass. The new brass increases the “bullet pull” or the resistance of the case against the bullet to help slow the release of the bullet once ignition takes place.
Now lets work through our reloading process in detail for the Handgun Raptors. I always full length resize my new brass to ensure it is all exactly the same diameter. I then seat my magnum primer firmly in the bottom of the primer pocket; you do not want the primer sitting off the bottom of the pocket as this can lead to misfires.

Next, I flare the case mouth. I want to flare the case mouth just enough to begin insertion of the bullet. Too much flare and you will reduce bullet pull. For some Handgun Raptors you will see benefit from chamfering the case mouth slightly.

(Right, Ideal case flare shown with the bullet inserting just beyond the beveled edge of the bullet. Left, too much flare shown)
Now moving onto charging the cases and how I work up my powder charge. For the 357 magnum I start just below 50% reloading manual data and work up in .5 grain increments. We will come back to powder charges in a moment.
I then seat my bullet. I use the Hornady seater die. Their seater plug will float laterally and aligns the bullets better than other seaters I have found for straight wall cases. I seat my bullets in 3 steps. I seat them about ⅓ of the way, rotate the case ⅓ and then seat them to the ⅔ point, rotate the case ⅓ and finish seating them. For seating depth we need to follow the same guidelines we would with any bullet for a revolver. We want the bullet to be below flush with the end of the cylinder and we want the case mouth to line up with a grove for crimping. For the 357 magnum I am seating them out longer than specified in the reloading manual but well within spec to function in my revolvers.
(Right, the bullet is even with the face of the cylinder and needs to be seated deeper. Left, the bullet is seated correctly and allows for some crimp jump under recoil)
Crimping is the final step in loading the Handgun Raptors and probably one of the most important. We need enough crimp to hold the bullet long enough to build pressure but not so much that we cause bullet deformation. I like to have the roll crimp go right over the edge of the Sealtite band. This helps prevent the bullet from jumping at all under recoil since it is locked in against the 90 degree corner of the band. When setting your initial crimp on the new brass you will be able to visually see when the brass folds over the edge of the Sealtite band. I prefer the LEE factory crimp die for this step.

(you can see the crimp just rolling the top edge of the brass over the Sealtite band. Also note the rings around the brass where the Sealtite bands are pressing against the inside of the case.)
Let’s now get back to that all important powder charge. As stated for the 357 magnum 105 Handgun Raptor I start off at 50% reloading manual charge data for a 110 jacketed bullet. I then increase that charge in .5 grain increments until I reach the point where I feel resistance from the powder when seating the bullet. The sweet spot for the powder charge is going to be between when the bullet just touches the powder and when the powder is lightly compressed.
I would now head to the range with one round at each half grain increment. At this point I am not worried about grouping or even a target. I am simply shooting them over a chronograph. I start shooting the loads from the lowest charge to the highest loading just one round at a time. I am looking for signs of high pressure as I go which includes but is not limited to, sticky extraction, flattened primers, and so on. What I am looking for with my chronograph data is the point where the velocities flatten out or plateau. I have found this plateau to be when the powder reaches optimal compression, if it becomes over compressed the velocities normally go down and at some point you will not be able to seat the bullet without damage to the projectile due to over compression.
Once I find the plateau I will go back to the loading room and start .3 below my plateau charge and work up to .3 above the plateau charge. I will load a full cylinder's worth of ammunition for each charge weight. I am now looking for groupings and chronograph data at the range.
(Do your shooting from your most stable position at a reasonable distance that you are confident in your abilities at.)
After this range outing you should have found an accurate load. I generally strive for my revolver reloads to be within about 50 feet per second of each other. This is a reasonable goal since you are trying to make multiple chambers shoot all the same way with the same ammunition. If you find that your velocities are spread out farther than you like you may want to try adjusting your crimp or seating depth before you adjust your powder charge.
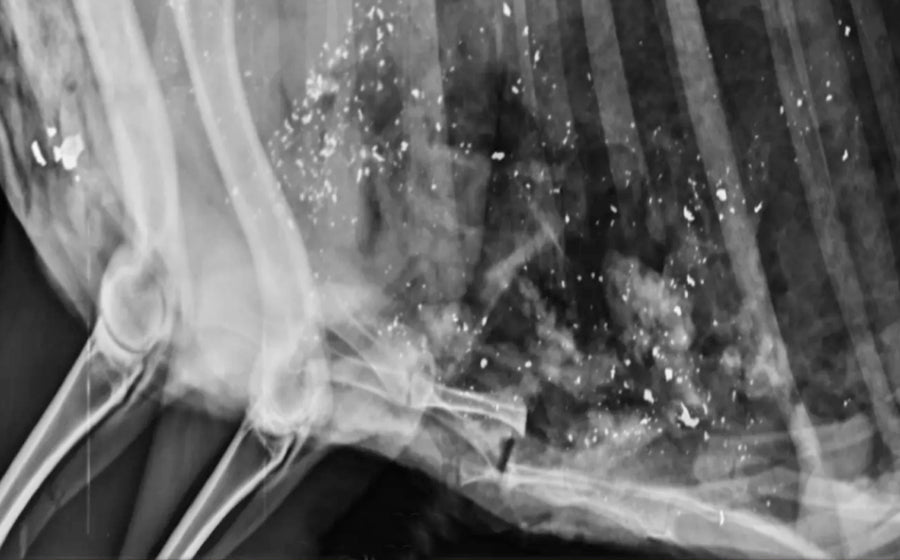
Over the past couple years of hunting and shooting the Cutting Edge Bullets Handgun Raptors I can confidently state that they are providing terminal performance above the standard jacketed hollow points I have hunted with for over two decades in a handgun. My original study on mono metal bullets can be found here:
https://cuttingedgebullets.com/blogs/news/mono-metal-bullets-a-multi-year-study

Chris Rhodes
CEB Pro Staff
Writer & Avid Handgun Hunter
Handgun Hunting Afield
